Wednesday, 29 August 2012

Little Robot Tank

Welcome back :)

Just wanted to show you something quickly.

A few weeks ago when I was at Spotlight wishing I was a fantastic seamstress (I am far, far, far from this), I came across loads of adorable iron on transfers - the far, far, far from being a seamstress' dream!

Today when I dropped my son off at Nanna's for an afternoon visit, she gave me some summer clothes she had bought for him. Included in the bundle was a cute, plain blue tank top. A-hah! As my next stop was Spotlight (one of my hangouts when I am on my own - how wild), this was the perfect opportunity to buy an iron on transfer and pretend I had sewn it on! Hurrah!

I know it's not all that exciting for most, but here is the before...

 
And the after...
 

Beep-dee-beep! How cute!
And super easy - once I located the iron...not much of an ironer either :)
 
Tank top by Target
Iron on transfer (Odyssey) by Beutron.
 
I am very much looking forward to the warmer weather, not just for my sanity but to make more of these!
 
Thanks for stopping by :)
 
Abs


Tuesday, 21 August 2012

Happy Birthday Pop.

Welcome back :)

So, as suspected, I was madly finishing my Dad's birthday present this morning...as he was coming over at 1pm. At least this year I had a genuine reason for cutting it fine instead of just being disorganised. Our little boy had to have minor surgery last week which was not really expected. That meant all craftiness was put on the back burner until he was feeling better. He is soooo much happier now which is a great relief.

Here's how Dad's present turned out...


Ta-Dah! Happy Birthday Pop!

Frame by Treasured Memories.
Paper, "Snips & Snails" by Doodlebug Design Inc.
Chipboard lettering and paint (navy blue & grass green) by Kaisercraft.
Buttons purchased at Spotlight.
Ribbon purchased at Paper Flourish.


A nice pile of loose buttons and snips of ribbon at the bottom of the frame...also, if any of the others happen to fall off, it won't be so obvious :)

How fun! And Dad really liked it. I'll definitely be making more shadow box frames down the track. Lots of possibilities. Next project: to finish my friend's album...at the rate I'm going, her daughter will be at school before it's finished....

Thanks for dropping by :)

Abs.


Monday, 13 August 2012

Last Minute...Again.

Welcome back :)

Just like last year, at the last minute, I have decided to make my Dad a birthday present. Last year's effort was a scrapbook which I was still putting together on the day I gave it to him. This year, considering it's only 7 days until his birthday, I am being a bit more realistic and making a shadow box frame.

I am trying to use up supplies that I already have at home instead of doing what every crafter does - buys more to use "one day". I already had the shadow box, loads of blue and green buttons and some chipboard lettering. I dressed my son in a blue top and took some pics to choose from, then we headed to the paper shop to see what else we could find...remembering not to go overboard...


All we needed was some paper, paint and ribbon! Watch this space for all the details and to see the finished product - most likely on the day we are going to give it to Dad :)


Back soon!

Abs


Thursday, 9 August 2012

More Sweet Nothings...

Hi again :)

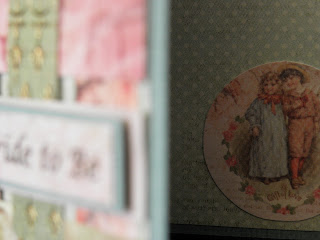
As mentioned in my previous post, I have been playing around with the "Sweet Nothings" collection by Kaisercraft. My mission was to at some point come up with a "Bride To Be" type of card - or just something pretty that I can give to my friend at her High Tea.

I think I have met the challenge. Take a look...


I have done a couple of these types of designs before - usually either when I have such a pretty collection of papers that I want to use a lot of them right away, or when I have little scraps of paper to use up. In this case it was the former. I just couldn't decide what to do next and with what, so I used a whole bunch of stuff at the same time :)
 I cut a few strips from five different papers in the paper pad, attached one end of these to my base paper, then threaded through more strips in the opposite direction - kind of like a paper lattice.


I used a couple of the "Sweet Nothings" rub-ons, this large flower I placed directly onto the paper lattice. I wasn't sure if it would work out but it's quite effective.


A cute little die cut (included in the paper pad) for the inside.


And a little cupid (from the Collectables) for the front. Pretty and romantic, but not over the top.

I really should get back to finishing my friend's album. Only three pages to go! Whoo hoo! We'll see what sort of motivation goes where :)

Thanks for stopping by

Abs


Saturday, 4 August 2012

Sweet Nothings

Hello again :)

The other day I bought some of Kaisercraft's "Sweet Nothings" collection. I needed something for a "bride to be" card to be given at a High Tea - so I wanted to use something pretty, yet kind of romantic too. The "Sweet Nothings" collection is oh so pretty with flowers galore and also kind of romantic with cherubs and little loving sentiments.

Here's what I've done so far...firstly, a generic card...


Materials used:
Kaisercraft "Sweet Nothings" Paper Pad and Rub Ons
Kaisercard "Latte"
Pearls also by Kaisercraft


These butterflies are cut from one of the papers included in the paper pad.


I sometimes like to add a strip of detail inside my cards too, just for some extra prettiness :) This one is along the bottom.

Next, a "thinking of you" card...

Again using the "Sweet Nothings" Paper Pad and rub ons, also Kaisercard "Sage" and a die cut from the "Sweet Nothings" Collectables.


The possibilities are endless...and lots of fun. Hopefully there will be some time tomorrow to do a few more. Watch this space!

Thanks for dropping by ;)
Abs